Quick start
Example 1. Getting started, screen markup and Python handlers.
Let’s create a new project, check that it runs on the device and create a process consisting of one screen, on which 2 numbers will be entered and the result of their addition will be calculated by pressing a button.
Deployment
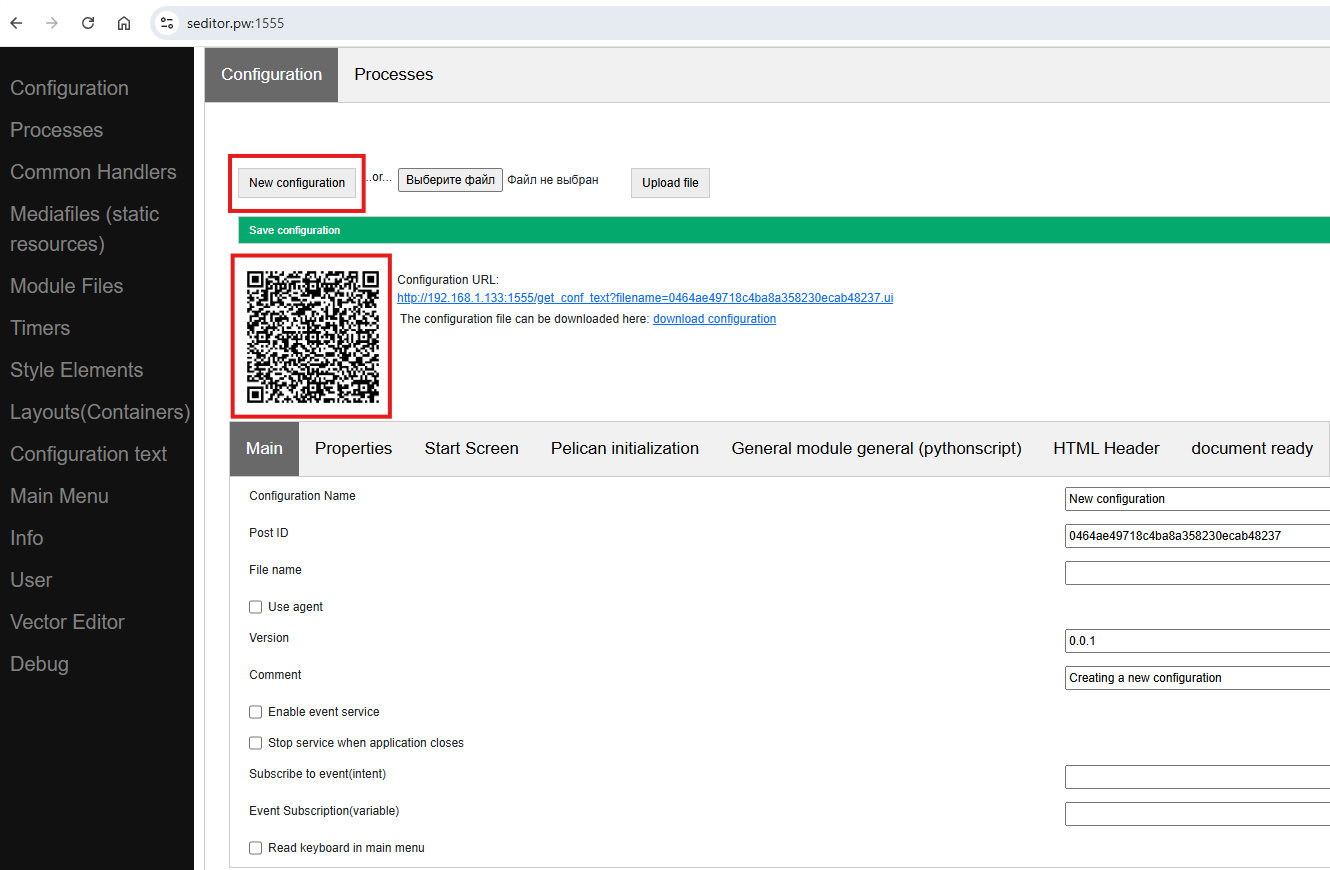
We launch the designer https://www.seditor.pw:1555/, select Configuration-New project… after which a primitive configuration is created, consisting of one process and a screen. This can already be viewed on the device and it’s time to check the connection with the device. The service broadcasts the configuration file upon request of the device on the network, this is convenient at the development stage, so as not to transfer the file manually
Note
You can download this constructor locally (https://github.com/dvdocumentation/web_simple_editor_en) and run it locally (for debugging and communication with the back-system, if required, you can also download the communication script https://github.com/dvdocumentation/simplebuslite). You don’t have to install anything special on your computer, but you can write the handler code in your IDE, linking it to the configuration via GitHub
Note
It is not necessary to transfer the configuration file via a web service, this can be done in any way via a file, sending it, for example, by mail or posting it on GitHub or another hosting. But this is convenient at the development stage to quickly deliver changes, so the designer also transmits the configuration file.
We need to transfer the connection settings to the constructor service on the device. This can be done via the QR code generated on the Configuration page. Launch Simple UI on the device and select QR settings from the menu, scan the code and restart the application (or click Update configurations in the main menu). The configuration menu should appear on the device - deployment was successful.
Actually, the development…
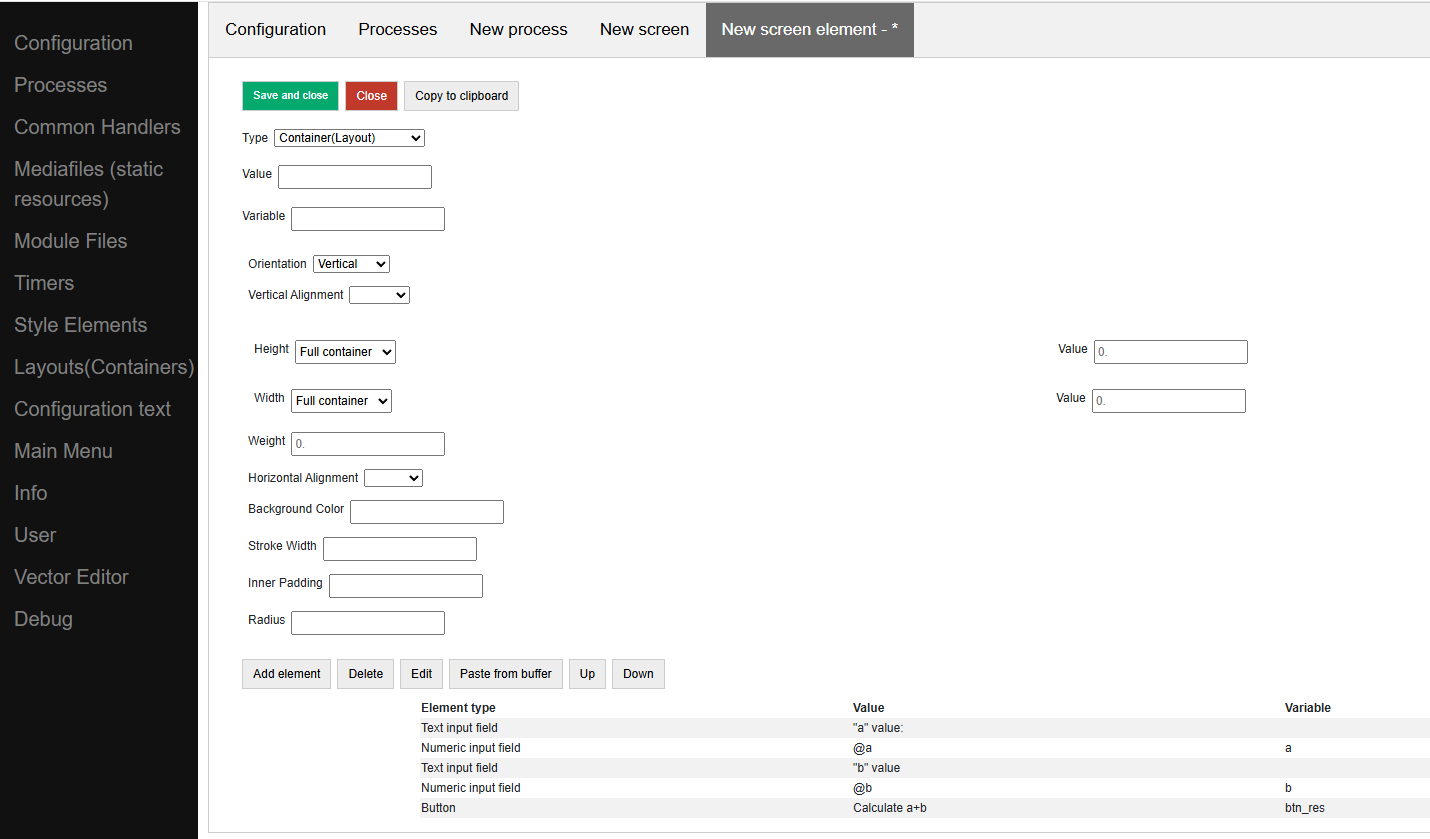
Rename the process name and the screen name to something meaningful. You can also set “Hide bottom buttons” since they are not needed. In the screen, in the Structure, add a new element “Container”, set the orientation to vertical and the Length and Width to the entire container. This will be the root container of the screen.
Let’s add several elements - labels, an input field and a button. For all of them, we set the width to the entire container. For the labels, we define the Value, for the input fields - variables that will contain the entered values. For the button, in the Value, we write the button’s label, and in the variable - a variable by which the handler will understand that this particular button was pressed.
Note
You can create a layout of any complexity by fitting other containers into a container – horizontal and vertical of any complexity.
Now you can restart the configuration on the device and see what happens.
All variables, events, commands are passed through the hashMap stack and returned through it. You need to put it into the hashMap with the put(key,value) function, read it with the get(key) function, check for existence with the containsKey(key) function, and remove it with remove(key).
Attention
All variables in this stack are strictly string! You can’t put a number, for example.
The variables a and b, which are associated with the input fields, are placed in the variable stack automatically. The result can be displayed on the screen as a Caption, but for simplicity we will display it in a pop-up message using the toast command.
All events are placed in the listener variable, so when a button is pressed, an event will be generated equal to the variable of this button as we set it in the screen structure.
To do this, go to the Handlers tab on the screen and add a new handler with the following fields:
Event=**onInput**
listener=**btn_res** (This is our button variable, you don’t have to write it, but choose from the options)
Action = run (meaning synchronous execution)
Handler type pythonscript (which means you can write the test directly in the editor)
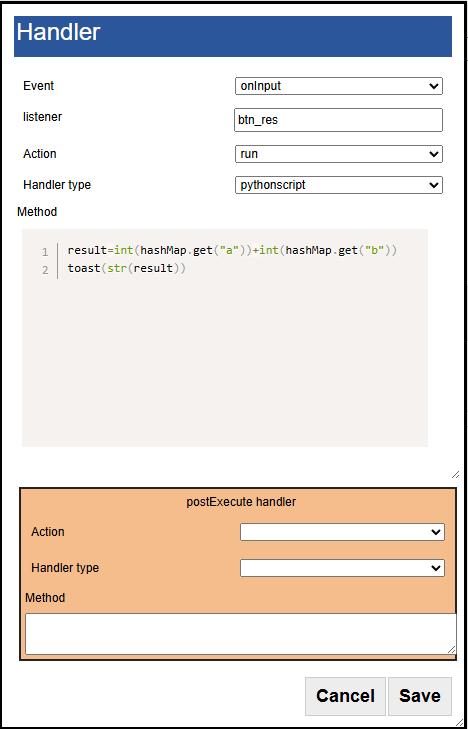
And we will write the following text in the handler text:
res = int(hashMap.get("a"))+int(hashMap.get("b"))
toast(str(res))
We do int() conversions because the values in the stack are strings. toast() – prints a message string.
We save and check.
Example 2. Scanning barcodes into a table on the device.
In this example, we will not recognize the nomenclature by barcode, we will not have a connection with an external program. There will only be barcodes that will be saved in a table on the device and displayed as a list.
Note: This example can be implemented in many different ways. For example, you can choose noSQL, SQL or files for storage. One possible implementation method is shown here - on “datasets”
Step 1. Let’s create a new configuration and deploy it as shown in Example 1
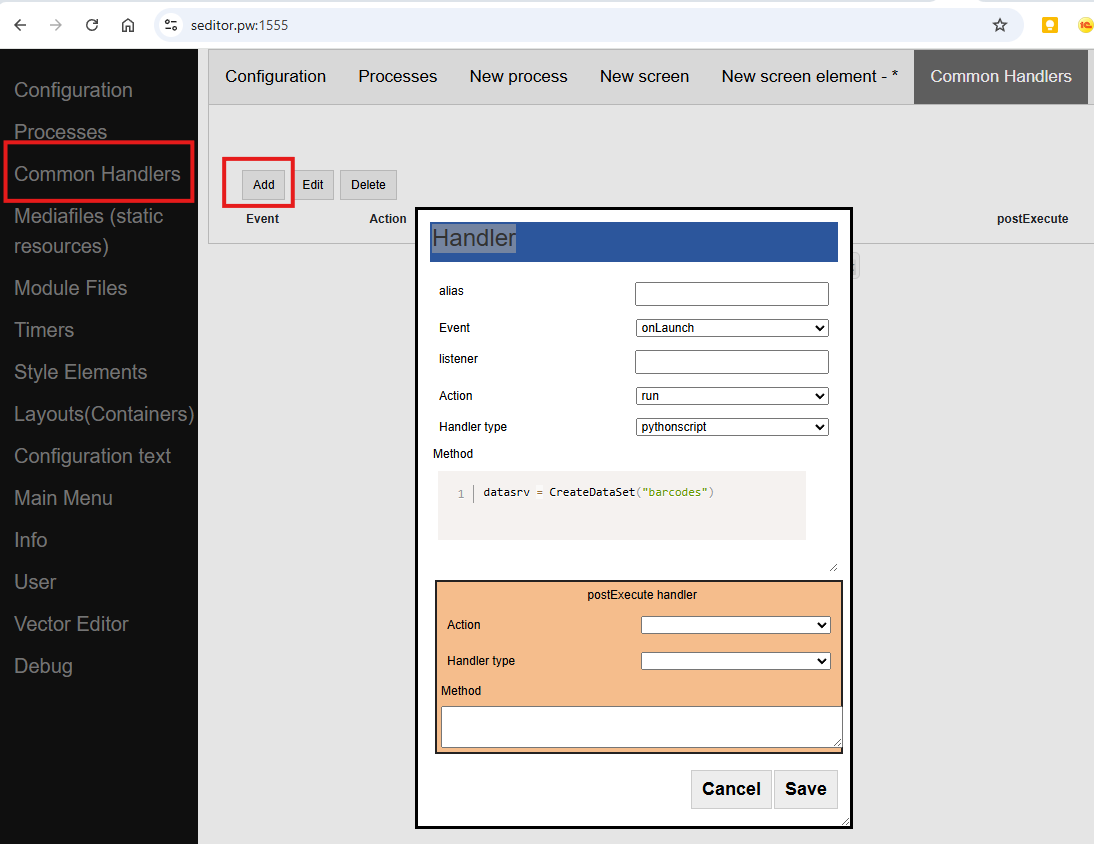
Step 2. First of all, let’s go to General handlers and add the onLaunch event (when the configuration is launched). Let’s add the creation of a dataset, which will contain our barcodes.
datasrv = CreateDataSet("barcodes")
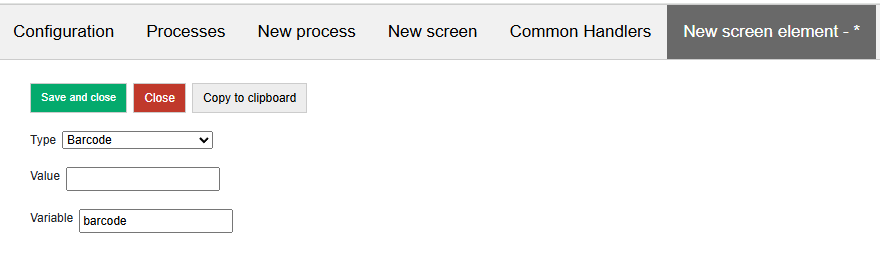
Step 3. Let’s go to the process (you can rename the Process and the screen as you like). In the screen, add the Barcode element, with the barcode variable
We will also create a root container, and in it we will place only one element, the List of cards, with the value @cards (@ indicates that the value should be taken from the variable stack)
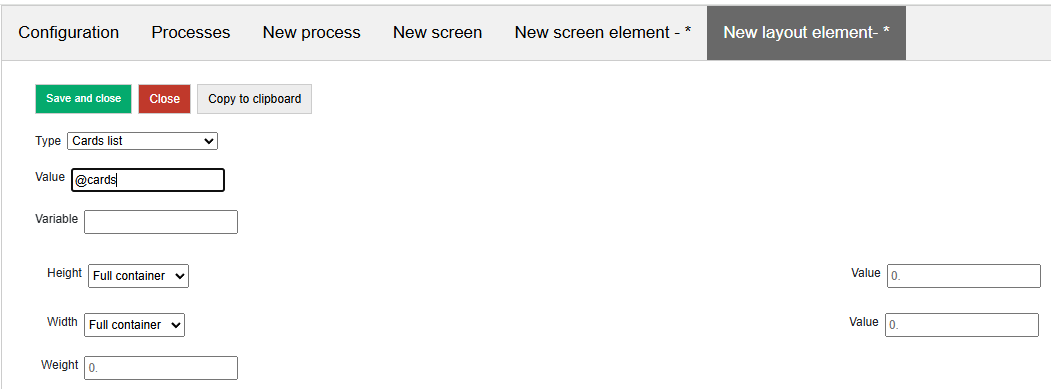
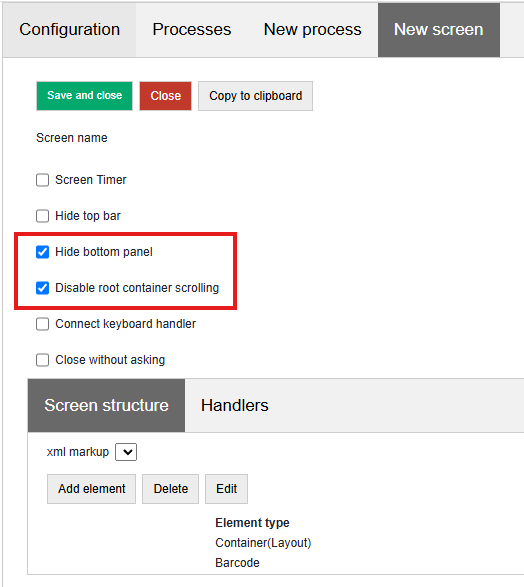
We will also disable scrolling of the root container (the list has its own scrolling) and disable the bottom button panel
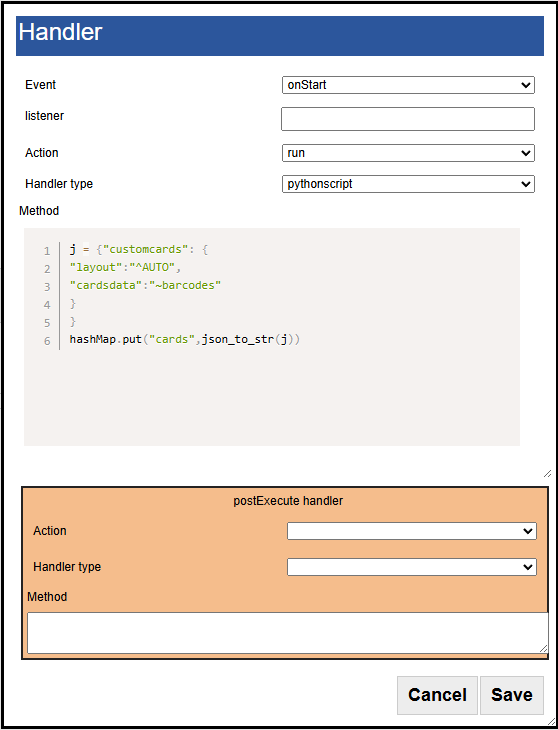
Step 4. Add the onStart handler (when the screen starts), as everywhere else, the handler type is pythonscript. And add the text to it:
 j = { "customcards": {
 "layout": "^AUTO",
 "cardsdata":"~barcodes"}
 }
hashMap.put("cards",json_to_str(j))
Let’s analyze what we just did. The dictionary j has a certain structure - customcards, layout, cardsdata - this is the structure of the card list variable. It defines the type, behavior and options (there are none in this case) and the list data.
In layout the layout of the list items is specified, but if you don’t want to draw them, you can specify the reserved word AUTO – then the layout will be generated automatically.
In cardsdata the dataset is specified explicitly, or a reference to an object of the “dataset” type (via the ~ prefix), as in this case (we initialized the dataset when starting the configuration)
Next, we need to convert this dictionary to JSON and pack it into a variable. This is done using the json_to_str function (a wrapper for json.dumps(,ensure_ascii=False))
Step 5. Now let’s add another handler - onInput, listener=barcode (you can choose from the list)
And let’s add some text there
ds= GetDataSet("barcodes")
data = [{"barcode":hashMap.get("barcode")}]
ds.put(json_to_str(data))
What did we write? GetDataSet(“barcodes”) – get the object of the previously created dataset. put() – add data. As an array – this is the format.
Save, check. Scan the barcodes. They are added.

Example 2+
Add primitive storage
Try to close/open the process. Previously scanned barcodes are saved because the dataset is stored in memory in the system. But if we restart the application (or Update configurations) everything will disappear.
Let’s add a couple of new lines to onLaunch:
datasrv = CreateDataSet("barcodes")
if datasrv.isSaved():
       datasrv.load()
Here we check that if the dataset is saved, we load it from disk.
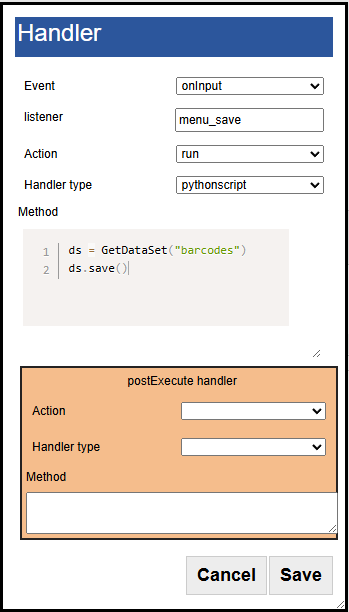
Now we need to add the save itself. Let’s add the Save menu item to the screen (or you can add a button). The menu item will be located in the screen options menu (on the right, at the top)
And let’s add a handler for it:
ds= GetDataSet("barcodes")
ds.save()
Now we have saving working. We can check.
Note
Strictly speaking, datasets are not very good for such a scenario, it is not a full-fledged DBMS after all. For an example of several thousand barcodes, this is fine, but if there are several million of them, the loss of productivity will already be felt. Their use in the example is due to a slightly simpler code than for the Pelican DBMS. In the next example, similar actions (saving what was entered in the device will be done on the DBMS), and datasets will be used for their intended purpose - to store reference books of an external system.
Example 3. Offline inventory of goods, connection with an external system
In this example we will consider the following scenario:
Reference catalogs(products, barcodes) and documents are downloaded from an external system and stored locally on the device (in datasets).
When scanning, the product is determined, the quantity is entered. Everything works offline. The fact of availability of the product according to the documents is filled in.
When in the coverage area, the data stored on the device is transmitted to an external system online.
An example will be published later.